
How effective UX design process can produce high performance apps
The Photo Sharing Application
The Photo Sharing Application is an iPhone application for Photo Sharing, with SnapApp the users can save all their favorite photos in the quick snap album, they can also create different albums and share the specific album with their friends who will be able to see the friends list in the specific album, check the photo’s Exif data, check the photo on the map view, and check the photos in timeline. The Photo Sharing app also added the Watch App support to our Photo Sharing iPhone app
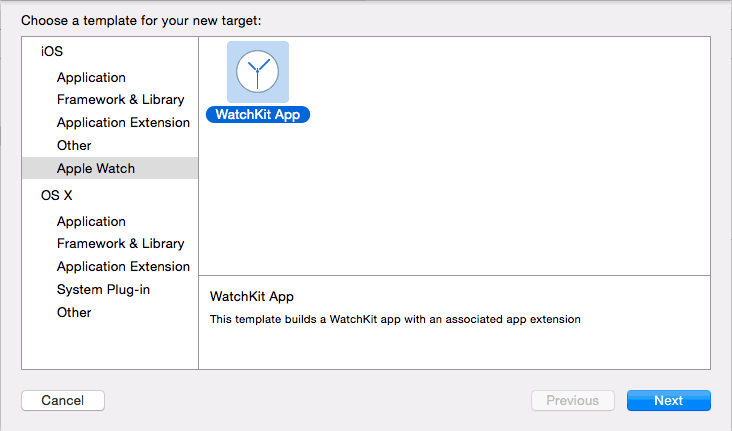
Let’s get started to show the photo albums on the Watch. Firstly, we open the Photo Sharing Application in Xcode, then navigate to File\New\Target… and on the left side of the pop up window select the iOS\Apple Watch\Watch App template, and then click the Next blue button to continue.
On the next screen, we will need to fill in many of the text fields, and also you won’t be able to change values such as the Product Name, Organization Identifier. Here we select Swift as the develop language, and here we unselect both Include Notification Scene and Include Glance Scene. Click Finish and Xcode will set up the targets and some starter template files for the Watch app interface.

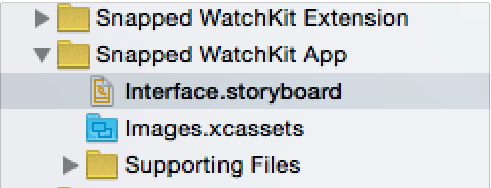
As we already talked in Part 1, this option actually will create two more targets: WatchKit App and WatchKit Extension.You will also see these folder from the navigation on the left side of the Xcode. Here we can see very clear that the Watch App group contains just the storyboard and image assets, there is no file for code at all. This will be the VIEW part that the user will see on the Watch. And the WatchKit Extension contains the MODEL and Controller code files which are executed upon events like the app launching, button taps etc.
Apple Watch UI Layout
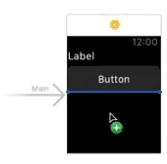
Firstly, we need to know that customizing WatchKit UI elements are not currently supported. As we know the Apple watch screen is small, we don’t have a lot of the room for the UI elements, So what should we notice for the Apple watch UI layout? First, you may notice that every time when you drag an UI element to the storyboard, there is a blue spacer line that we wouldn’t see on an iPhone storyboard(Please check the screen shot). The blue spacer line makes sure we’re positioning elements in a comfortable distance from the edges. we should be comfortable our controls actually touching the edges of each other and the interface controller here on the storyboard. The other very important thing we also need to notice is “Group”. You should realize that when you add new elements, they don’t want to sit beside each other. By default, they will automatically stack top to bottom. Even if the new element that you added is very small, like a label, and doesn’t need much space, it’s going to take up an entire line, it doesn’t want to sit beside any other UI element. The only way to position two or more Watch UI elements beside each other on the same line is to make them part of a “Group”. Group begins just as an invisible container. We can add a group to our UI and it stacks vertically, like all the others, going from top to bottom and it takes up the full line, left edge to right edge. But if we then drag other UI elements inside that group, we can position them horizontally within the group itself. So we use groups a lot when creating anything beyond the most basic Watch App user interface.
In the Photo Sharing Watch App, for the album list screen, we use the table view. And in the table view, the album thumbnail image and the album name is in the same Group which has the layout set as Horizontal. These screens that we can see on the App Watch are included in the “Snapped WatchKit App” folder in the navigation as you can see in the screen shot.
When we open the app from the watch, the watch App will try to send request to the containing iOS app for the sessionID, which will be used for sending the request to the back end web service for the albums’ data. And the Code that sends the request to the containing iOS app and web service is included in the “Snapped WatchKit Extension” folder in the navigation.
In the Part 3 section, we will see how to create the specific Photo Sharing Watch App screens. If you missed Part 1, you can see it here.